DealAxis Internet Explorer Permissions
Once the DealAxis Internet Explorer Zone has been identified, the next step is to configure
Internet Explorer permissions.
Customising Permissions
To customise permissions for the DealAxis Internet Explorer zone, start Internet Explorer, select Tools / Internet Options / Security,
select the zone and click 'Custom Level'. This invokes a dialog as below with a large number of settings.

The permissions that need to be set are those listed below and these are enabled by default for the Trusted Sites, Local Intranet and Internet
zones. It is possible that IT departments will have disabled some of these permissions however, in which case they will need to be enabled for
the DealAxis Internet Explorer zone.
- Run Components Signed With Authenticode
- Run Components Not Signed With Authenticode
- Run ActiveX Controls and Plugins
- Script ActiveX Controls marked Safe for Scripting
Checking Internet Explorer Permissions
Click the below link to view the Internet Explorer permissions in effect for your user. This will invoke a small Windows
program on the local PC which will read and display the Internet Explorer settings.
Check Internet Explorer Permissions
Results
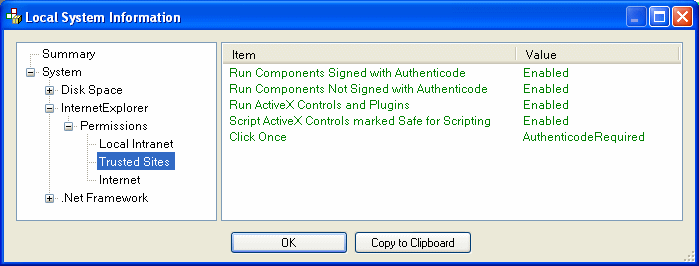
If all browser permissions are satisfied you should see results as follows, with all text displayed in green.

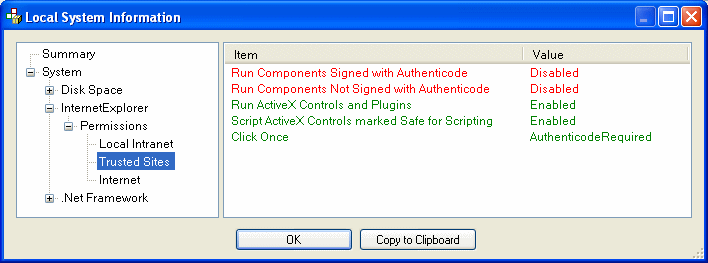
If any permissions are potentially incomptible with DealAxis they will be displayed in red as follows, so that they can
be quickly identified. These settings will then need changing by banks' IT departments.

Further details
For details on why DealAxis requires these Internet Explorer permissions see the
Internet Explorer Permission Details page.
For details on how to configure browser permissions via the Windows registry in locked down environments, see the
Configuring Internet Explorer via the Windows Registry page.
Next ...
Once the DealAxis Internet Explorer permissions have been configured the next step is to
Install DealAxis .Net Security Permissions for the DealAxis Internet Explorer zone.
Return to home page
Copyright © Dealogic Ltd


